This week I wanted to talk about the equipment is commonly used for podcast recording. I’d love to record you at my studio here, but if you’ve been thinking of recording at home, I’d be happy to help you with that too! One of my reasons for opening this studio is that the technical barriers to entry can be daunting to folks without an audio background. I sell recording and live sound equipment as my day job, and every week someone comes in that is thinking about starting their own podcast. Here are a few setups I show them, with some pros and cons to each!
- The bare minimum: http://a.co/ad3ZRQQ
This setup will get you started pretty quickly, and will work for you as a solo podcast host. The Blue Yeti is an all-in-one recording interface/microphone. It connects to your computer via USB, and all audio to and from your PC passes through the Yeti. You plug your headphones into the yet to hear yourself and the audio from your computer. It is usually “plug and play,” which means their should be minimal setup to get your computer to recognize the device. The Yeti has a switch that will make it “omni-directional” which means it will pick up sound from any direction, which could be useful if you wanted to have a guest in the room with you. While the omni-directional switch makes the microphone a little more flexible, it has the downside of picking up everything else in the room you may not want on the recording. Sounds like your heating/AC, wheels rolling on the floor, bumps into the desk, doors opening and closing, all have the potential to be picked up by a microphone with an omni pickup like the Yeti. Another drawback to this solution is that you can’t upgrade it, you’d basically just be starting over again with the next package.
- The Basics – Room To Grow: http://a.co/0AJzPcR
With this setup, you will get noticeably better sound quality, and more flexibility. The Focusrite 2i2 interface is your hub to get all of your audio in and out of the computer. The interface connects via USB to your computer, and then all of your audio devices connect to the interface. With the Mackie mixer, you’ll be able to plug in two microphones, an external media device such as a phone or separate laptop for music playback, and the iRig2. What’s the iRig2 for? Phone calls! You’ll be able to patch your phone (if it still has a 3.5mm jack) into the iRig2, and use the aux output on the Mackie to send your microphones back to the phone so that you can record conversations with remote guests. I included the Sennheiser E835 with this setup. It’s a dynamic microphone, which means you’ll need to have it close to your mouth, but it will pick up a lot less of your room sound. It’s also easier to get that “radio broadcaster” type sound from a dynamic microphone with a little EQ and compression. I’ve also suggested a nicer set of headphones. The HD280s are an industry standard for recording and have exceptional acoustic isolation with minimal sound bleed that could effect your recording. With this setup, any of the individual components could be upgraded in the future. You could get better microphones and still use the same mixer and interface, or get a bigger mixer to allow more microphones, or eliminate the mixer all together and get a bigger interface..Which leads us to the next rig.
- The Semi-Pro: http://a.co/c8u31YL
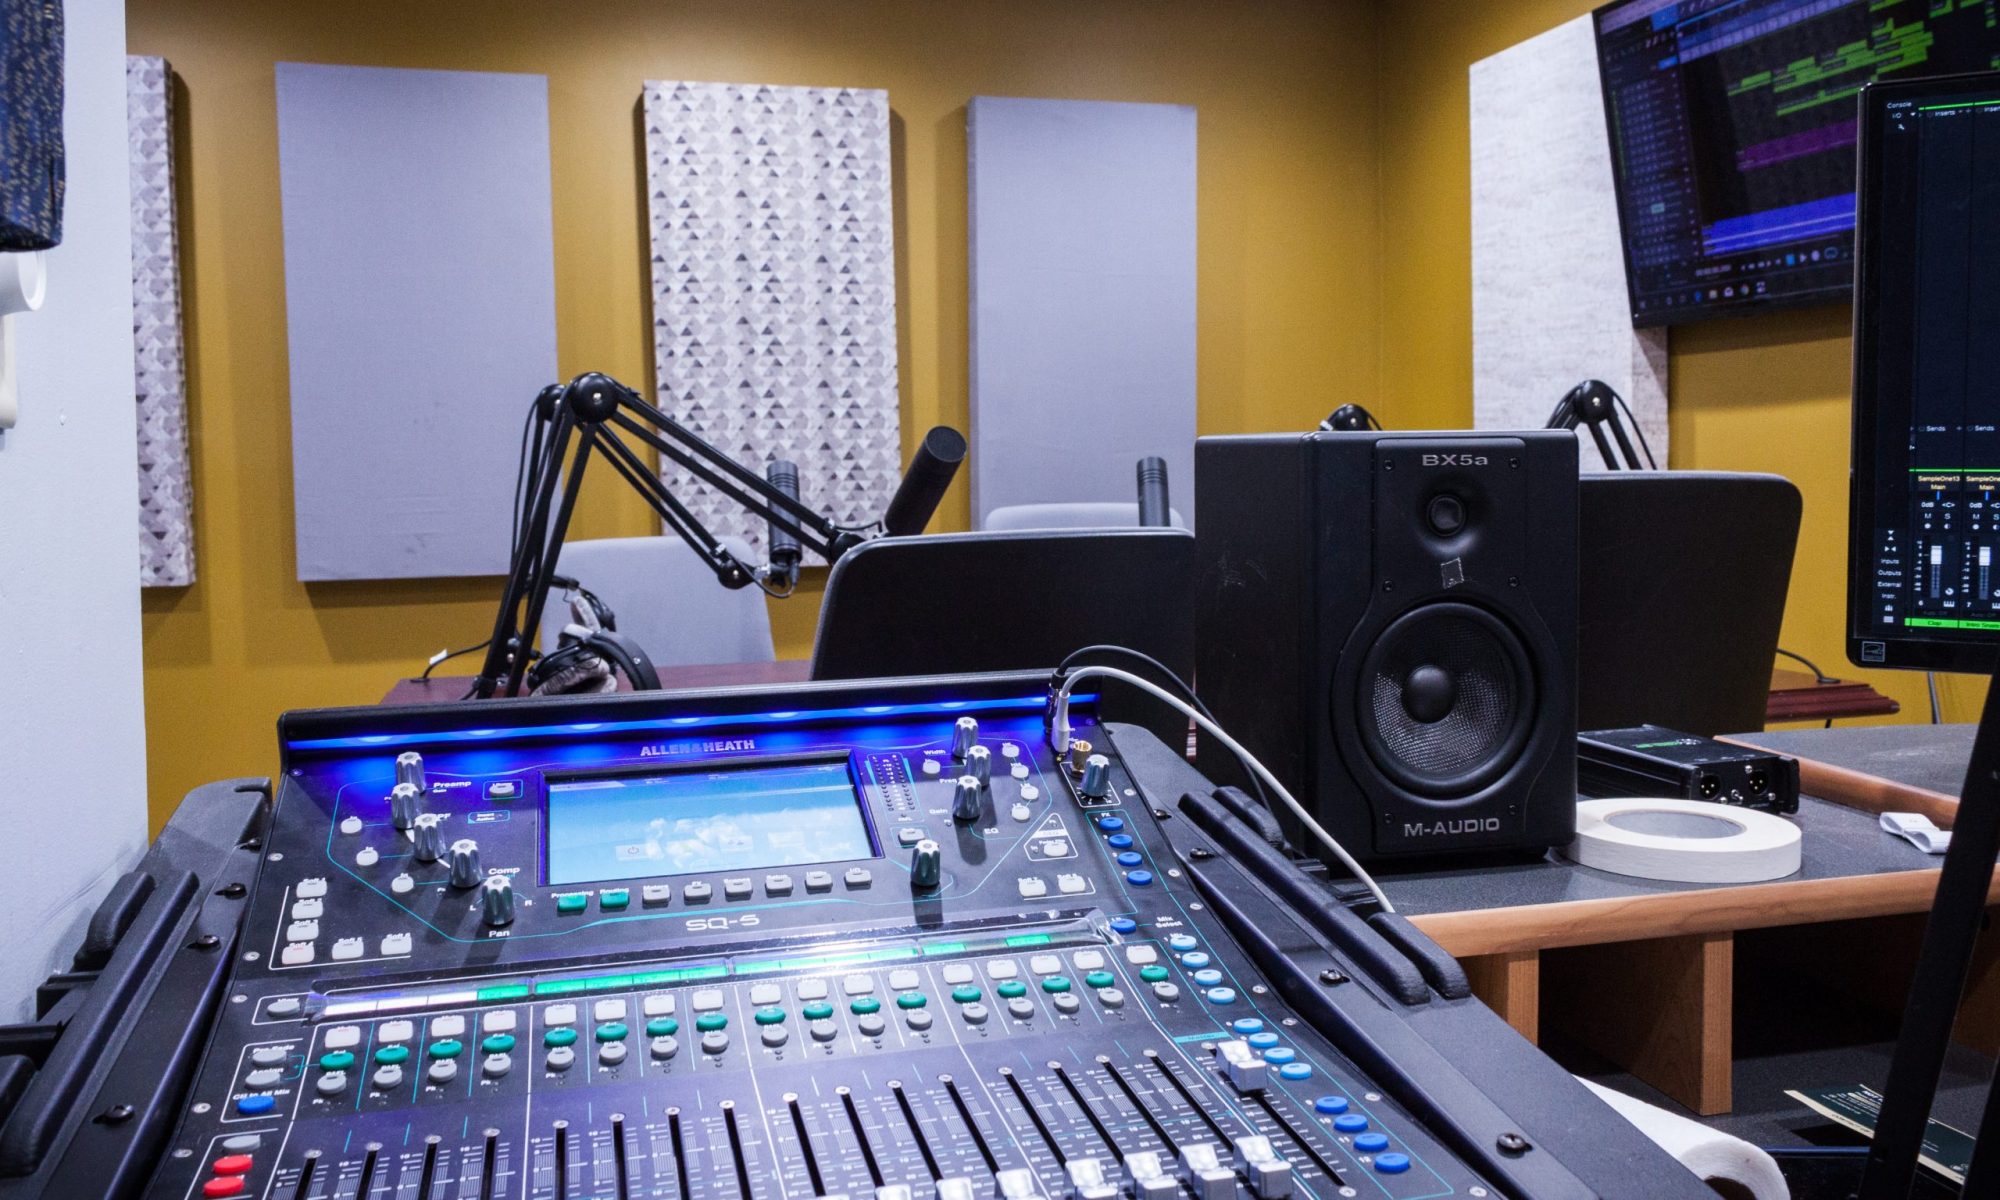
With the previous setup, all of our audio would have been recorded on just two tracks. This means that if something was recorded too quietly or too loudly, we wouldn’t be able to isolate that particular element (maybe the audio coming from the phone call) and correct it. With this setup, we’ll forgo the mixer and go for a larger interface. The Focusrite 18i20 will let us plug in up to 8 sources directly to the interface, with digital inputs and outputs offering even more if you need them. This is essential if you want to have a multi guest podcast, with the ability to go back and edit/alter each person individually after the recording. We’ve also stepped up to a serious broadcast-quality microphone, the Aston Stealth. These are the mics we use in the studio, and I really like the way they sound. Many of these types of microphones require an additional pre-amp to to work properly, but the Stealth has one built in! We’ve also upgraded to a nicer set of headphones, as well as added a set of studio reference speakers. With these, we’ll really be able to hear all of the little details of our recording that we might not in a cheaper set of headphones. It’s really important to have an accurate playback of your sound, so that you can make educated decisions about volume, eq, compression, etc. If you want multiple guests, multiple headphone mixes, a few external audio devices, and everything recorded on its own track, this is the setup to go with.
There’s so many more little details to go into when it comes to home recording. What cables to use, how to connect it all, which software to go with, how the software works, etc etc..These are all the details we have worked out at Audiohive Podcasting! It’s a big investment to get into podcasting. Not just in money, but in time as well! I’ve covered mostly hardware, but haven’t even touched on software. There are lots of options, even some free ones, but what they all have in common is the learning curve. It’s steep! I’m committed to helping people make podcasts, one way or another. Reach out to Audiohive, we can do it all for you, or coach you through the process to get you up and running at home. Contact us to schedule a visit to the studio, and we can find out what’s best for your podcast.